PolicyPak
Software Package Manager
Software Package Manager
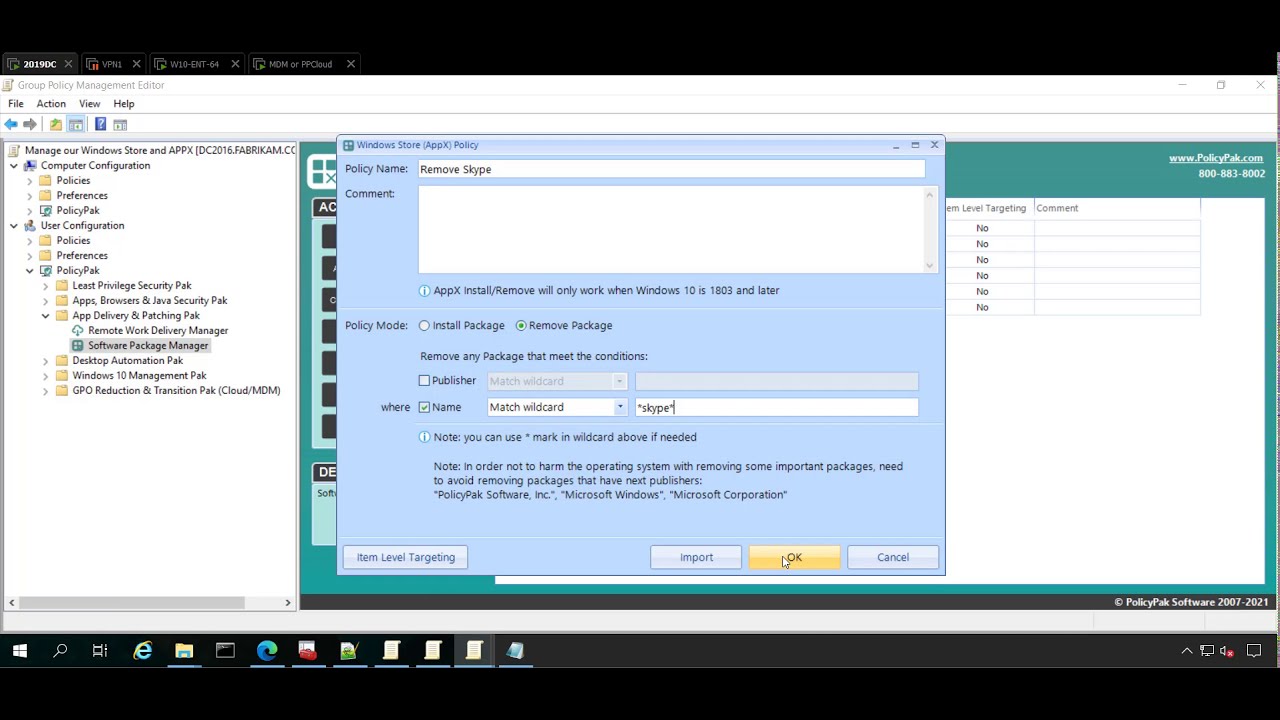
Banish “junkware” like Candy Crush from you Windows 10 & 11 Environment. Quickly remove unwanted built-in or user-added Microsoft Store applications (aka UWP / Windows Universal Applications). Likewise, quickly add any Windows Store applications which you want to ensure users have access to. Deploy applications quickly, or remove them by package name or all from a specific publisher.

Deploy any Windows store application

Automatically deploy; without user interaction

Specify which applications users can and cannot use

Uninstall downloaded software, games and unused in-box software